How to develop a simple ToDo app using AngularJS and Node.js
Following previous tutorial on developing a responsive website using Node.js and Express Framework, we are going to integrate a simple AngularJS “ToDo” app with our existing project.
Prerequisites
Before continuing with this, make sure you have followed the previous tutorial and have set up your Node.js Project. Or simply download the source from nodeEclipseTutorial and open the project with your favourite Editor.
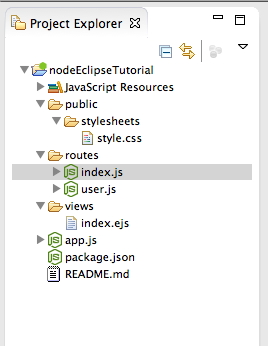
Node Project Structure
First we need to include the AngularJS in Heading section. From project folder open views -> header.ejs file and replace the content with the following:
<head>
<meta charset="utf-8">
<meta name="viewport" content="width=device-width, initial-scale=1.0">
<meta name="description" content="">
<title><%= title %></title>
<link rel='stylesheet' href='/css/stylesheet.css' />
<!-- Latest compiled and minified CSS -->
<link rel="stylesheet" href="//netdna.bootstrapcdn.com/bootstrap/3.0.3/css/bootstrap.min.css">
<!-- Optional theme -->
<link rel="stylesheet" href="//netdna.bootstrapcdn.com/bootstrap/3.0.3/css/bootstrap-theme.min.css">
<script src="https://code.jquery.com/jquery.js"></script>
	<!-- Latest compiled and minified JavaScript -->
<script	src="//netdna.bootstrapcdn.com/bootstrap/3.0.3/js/bootstrap.min.js"></script>
<script src="https://ajax.googleapis.com/ajax/libs/angularjs/1.3.0-beta.5/angular.min.js"></script>
<script type="text/javascript" src="/js/todo.js"></script>

<style type="text/css">
.done-true {
  text-decoration: line-through;
  color: grey;
}</style>
</head>
Adding HTML elemements
Next we need to add the required HTML elements including the AngularJS directive to the index.ejs file.
From views folder open index.ejs file and replace everything with the following:
<!DOCTYPE html>
<html ng-app>
<% include header %>
<body>
	<% include navbar %>

	<!-- Main jumbotron for a primary marketing message or call to action -->
	<div class="jumbotron">
		<div class="container">
			<h1>Todo</h1>
			<div ng-controller="TodoCtrl">
				<span>{{remaining()}} of {{todos.length}} remaining</span> [ <a
					href="" ng-click="archive()">archive</a> ]
				<ul class="unstyled">
					<li ng-repeat="todo in todos"><input type="checkbox"
						ng-model="todo.done"> <span class="done-{{todo.done}}">{{todo.text}}</span>
					</li>
				</ul>
				<form ng-submit="addTodo()">
					<div class="col-lg-6">
						<div class="input-group input-group-lg">
							<input class="form-control" type="text" ng-model="todoText"
								size="30" placeholder="add new todo here"> <span
								class="input-group-btn">
								<button class="btn btn-primary btn-lg" type="submit">Add</button>
							</span>
						</div>
					</div>
				</form>

			</div>
		</div>
	</div>

	<div class="container">
		<hr>

		<% include footer %>
	</div>
	<!-- /container -->
	<script type="text/javascript">
		$(document).ready(function() {
			$('#home').addClass("active");
		});
	</script>
</body>
</html>
Understanding the above code:
On the top of the HTML code we start with , Use ng-app directive to auto-bootstrap an AngularJS application.
Next is <div ng-controller=”TodoCtrl”>, The ngController directive attaches a controller class to the view. we will write this controller inside our todo.js file.
Next ng-click=”archive()”: The ngClick directive allows you to specify custom behavior when an element is clicked.
ng-repeat=”todo in todos” : The ngRepeat directive instantiates a template once per item from a collection.
ng-model=”todo.done”: The ngModel directive binds an input,select, textarea (or custom form control) to a property on the scope using NgModelController, which is created and exposed by this directive.
Adding JS functions
Under public folder create another folder named “js” and inside js folder create a js file name todo.js.
function TodoCtrl($scope) {
  $scope.todos = [
    {text:'learn angular', done:true},
    {text:'build an angular app', done:false}];

  $scope.addTodo = function() {
    $scope.todos.push({text:$scope.todoText, done:false});
    $scope.todoText = '';
  };

  $scope.remaining = function() {
    var count = 0;
    angular.forEach($scope.todos, function(todo) {
      count += todo.done ? 0 : 1;
    });
    return count;
  };

  $scope.archive = function() {
    var oldTodos = $scope.todos;
    $scope.todos = [];
    angular.forEach(oldTodos, function(todo) {
      if (!todo.done) $scope.todos.push(todo);
    });
  };
}
Understanding the Controller function
We have a simple function named TodoCtrl() , however we have a special parameter $scope. It is simply used by AngularJS to talk to the ng-model directive in our HTML code.
We can simply pass the $scope into the controller and using an array defined some data (i.e. $scope.todos[]) as well as defining custom functions to handle different functionalities such as updating UI and saving the data to the database.
What Next
Download Source Code for this Project: Angular-Node Tutorial
Next tutorial we will define a SQL table and use Node.js backend to save and retrieve the data back.
READ MORE
https://github.com/angular/angular.js/wiki/Understanding-Directives

I have downloaded this project but how to run it? Its not working..
And where is the next tutorial, please help..